|
ROLAND
0.70
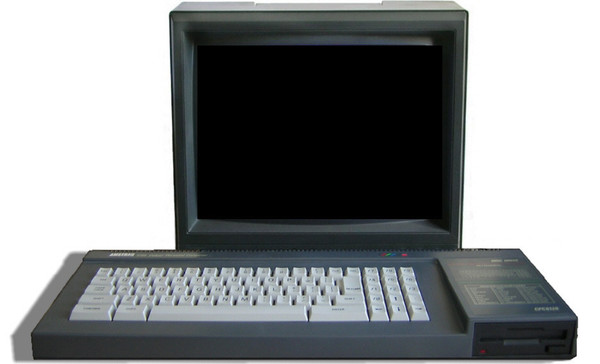
Amstrad Emulator based on Caprice Source rewritten in C++.
|
|
ROLAND
0.70
Amstrad Emulator based on Caprice Source rewritten in C++.
|

This can be tested with the following code:
The 8255 is a general purpose input/output IC. This document will describe it's role in the Amstrad CPC,CPC+ and KC compact systems. To understand it's full functions please read the datasheet.
In these systems it is connected to the AY-3-8912 Programmable Sound Generator (PSG), keyboard, cassette recorder, the VSYNC of the 6845 CRTC and the "busy" signal from the parallel port.
The PPI is selected when bit 11 of the I/O port address is set to "0", bits 9 and 8 then define the PPI function access as shown below:
| Bit 9 | Bit 8 | PPI Function | Read/Write status |
|---|---|---|---|
| 0 | 0 | Port A data | Read/Write |
| 0 | 1 | Port B data | Read/Write |
| 1 | 0 | Port C data | Read/Write |
| 1 | 1 | Control | Write Only |
It is advised that the remaining bits of the I/O address are set to "1" to avoid conflict with other devices. The recommended I/O addressess are:
| I/O address | PPI Function |
|---|---|
| &F4xx | Port A data |
| &F5xx | Port B data |
| &F6xx | Port C data |
| &F7xx | Control |
In the CPC+, the 8255 is integrated into the ASIC. The "emulation" is not complete and some functionality is not available. Please see the "Extra CPC+ documentation" for more information.
NOTE:
Operating system settings:
NOTE:
| Bit | Description | Usage |
|---|---|---|
| 7 | PSG databus | Read data from PSG or Write data to PSG |
| 6 | ||
| 5 | ||
| 4 | ||
| 3 | ||
| 2 | ||
| 1 | ||
| 0 |
Operating system settings:
| Bit | Description | Usage |
|---|---|---|
| 7 | Cassette read data | |
| 6 | Parallel/Printer port ready signal | "1" = not ready, "0" = Ready |
| 5 | /EXP | (note 6) |
| 4 | (note 5) | |
| 3 | (note 1) | (note 4) |
| 2 | (note 2) | |
| 1 | (note 3) | |
| 0 | 6845 VSYNC | State of VSYNC from 6845. "1" = VSYNC active, "0" = VSYNC inactive |
Note:
Table showing manufacturer name on power-up (CPC and CPC+ only):
| Bit 3 | Bit 2 | Bit 1 | Manufacturer Name |
|---|---|---|---|
| 0 | 0 | 0 | Isp |
| 0 | 0 | 1 | Triumph |
| 0 | 1 | 0 | Saisho |
| 0 | 1 | 1 | Solavox |
| 1 | 0 | 0 | Awa |
| 1 | 0 | 1 | Schneider |
| 1 | 1 | 0 | Orion |
| 1 | 1 | 1 | Amstrad |
Operating system settings:
| Bit | Description | Usage |
|---|---|---|
| 7 | PSG BDIR | PSG function selection |
| 6 | PSG BC1 | |
| 5 | Cassette Write data | |
| 4 | Cassette Motor Control | set bit to "1" for motor on, or "0" for motor off |
| 3 | Keyboard line | Select keyboard line to be scanned (0-15) |
| 2 | ||
| 1 | ||
| 0 |
PSG function selection:
| Bit 7 | Bit 6 | Function |
|---|---|---|
| 0 | 0 | Inactive |
| 0 | 1 | Read from selected PSG register |
| 1 | 0 | Write to selected PSG register |
| 1 | 1 | Select PSG register |
LD B,&F7                ;8255 Control port
LD A,%00001111          ;Bit Set/reset function
OUT (C),A               ;Send it to 8255
RET
LD B,&F7                ;8255 Control port
LD A,%10011001          ;Configuration function
OUT (C),A               ;Send it to 8255
RET
In this example, port A is set to output, port B is set to input, and port C is set to output, and they are all operating in mode 0.
We will only be using port A for these examples.
                        ;Set port A to input

LD B,&F7                ;8255 Control port
LD A,%10010010          ;Configuration function
OUT (C),A               ;Send to 8255

LD B,&F4                ;Port A port address
IN E,(C)                ;Get byte from port

                        ;Register E holds value from port

                        ;Return port I/O status and operating modes
                        ;to previous settings.

LD B,&F7                ;8255 Control port
LD A,%10000010          ;Configuration function
OUT (C),A               ;Send to 8255
RET
                        ;Set port A to output

                        ;(Note the next few lines are not necessary
                        ;as port A is already acting as output, however
                        ;it is given here just to make the example
                        ;more understandable)

LD B,&F7                ;8255 Control port
LD A,%10000010          ;Configuration function
OUT (C),A               ;Send to 8255

LD B,&F4                ;port A port address

                        ;Register E holds value to put into port

LD E,&FF                ;Data to put into port
OUT (C),A               ;Send to port A

                        ;Return port I/O status and operating modes
                        ;to previous settings.

LD B,&F7                ;8255 Control port
LD A,%10000010          ;Configuration function
OUT (C),A
RET
 1.8.11